Node Monitoring with Prometheus

Node Monitoring with Prometheus

mainnet-config.json
nano mainnet-config.json

In this file search for

"hasPrometheus": [ "127.0.0.1", 12798 ],

Replace the IP address 127.0.0.1 with 0.0.0.0 to allow listening for external connections.

It should look like this afterwards... "hasPrometheus": [ "0.0.0.0, 12798 ],

cd ~
mkdir Downloads
cd Downloads
wget https://github.com/prometheus/node_exporter/releases/download/v1.0.1/node_exporter-1.0.1.linux-amd64.tar.gz
tar xvfz node_exporter-1.0.1.linux-amd64.tar.gz
rm node_exporter-1.0.1.linux-amd64.tar.gz
cd node_exporter-1.0.1.linux-amd64
sudo ufw allow proto tcp from IP.OF.MONITORING.SERVER to any port 9100
sudo ufw allow proto tcp from IP.OF.MONITORING.SERVER to any port 12798
./node_exporter

You are now preparing your monitoring server

cd ~
mkdir Downloads
cd Downloads
wget https://github.com/prometheus/prometheus/releases/download/v2.22.2/prometheus-2.22.2.linux-amd64.tar.gz
tar xvfz prometheus-2.22.2.linux-amd64.tar.gz
rm prometheus-2.22.2.linux-amd64.tar.gz
cd prometheus-2.22.2.linux-amd64/
nano prometheus.yml

We stick as closely as possible to official cardano documentation. Edit your file to look like this:

my global config

global:
scrape_interval: 15s # Set the scrape interval to every 15 seconds. Default is every 1 minute.
evaluation_interval: 15s # Evaluate rules every 15 seconds. The default is every 1 minute.
external_labels:
monitor: 'codelab-monitor'

scrape_timeout is set to the global default (10s).

Alertmanager configuration

alerting:
alertmanagers:
- static_configs:
- targets:

- alertmanager:9093

Load rules once and periodically evaluate them according to the global 'evaluation_interval'.

rule_files:

- "first_rules.yml"

- "second_rules.yml"

A scrape configuration containing exactly one endpoint to scrape:

Here it's Prometheus itself.

The job name is added as a label job= to any timeseries scraped from this config.

Please edit this one before pressing enter.

scrape_configs:
- job_name: 'cardano_relay1'
scrape_interval: 5s
static_configs:
- targets: ['IP.OF.YOUR.RELAY1:12798']
- job_name: 'node_relay1' 
scrape_interval: 5s
static_configs:
- targets: ['IP.OF.YOUR.RELAY1:9100']

Now for your second relay remember please edit this.

- job_name: 'cardano_relay2'e
scrape_interval: 5s
static_configs:
- targets: ['IP.OF.YOUR.RELAY2:12798']
- job_name: 'node_relay2' 
scrape_interval: 5s
static_configs:
- targets: ['IP.OF.YOUR.RELAY2:9100']

Please edit

- job_name: 'cardano_block'
scrape_interval: 5s
static_configs:
- targets: ['IP.OF.YOUR.BLOCKPRODUCER:12798']
- job_name: 'node_relay2' 
scrape_interval: 5s
static_configs:
- targets: ['IP.OF.YOUR.BLOCKPRODUCER:9100']

Thereafter, still on your monitoring server, you need to open two ports so that you can access the statistics in your browser and from any device you want.
sudo ufw allow proto tcp from any to any port 3000
sudo ufw allow proto tcp from any to any port 9090

Recap-Port 3000 is used by Grafana. After completing the setup you should be able to view the dashboard of Grafana from any client by opening IP.FROM.MONITORING.SERVER:3000 in your browser. Port 9090 is used by Prometheus. After completing the setup you should be able to view prometheus from any client by opening IP.FROM.MONITORING.SERVER:9090 in your brows

./prometheus --config.file=prometheus.yml

In your client browser, open IP.FROM.MONITORING.SERVER:9090. You should see the landing page of prometheus. Click on Status -> Targets to view your nodes. The state of all your node jobs should be "up"

When prometheus is working, you can continue with the next step: download and install grafana and start it.

cd ~/Downloads
wget https://dl.grafana.com/oss/release/grafana-7.3.2.linux-amd64.tar.gz
tar -zxvf grafana-7.3.2.linux-amd64.tar.gz
rm grafana-7.3.2.linux-amd64.tar.gz
cd grafana-7.3.2
cd bin
./grafana-server
In the next step you need to add prometheus as data source. Click on:
In the next screen click on prometheus
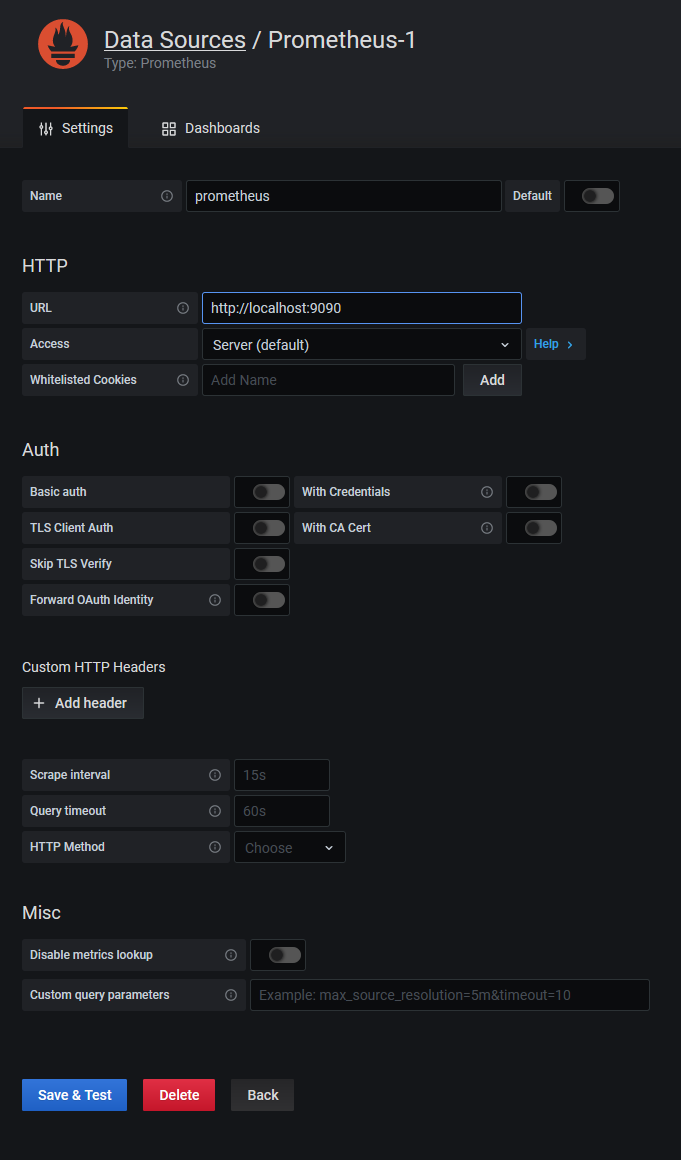
In the next step, fill out the form as below. Please be careful: prometheus must be written lowercase! Otherwise your dashboard won't work!
In the next step, we need to import the precombiled dashboard of IOHK.
Copy cardano-application-dashboard-v2.json from the cardano-ops repository to your clipboard.
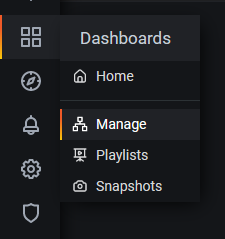
In grafana, in the left menu, click on Dashboards -> Manage.
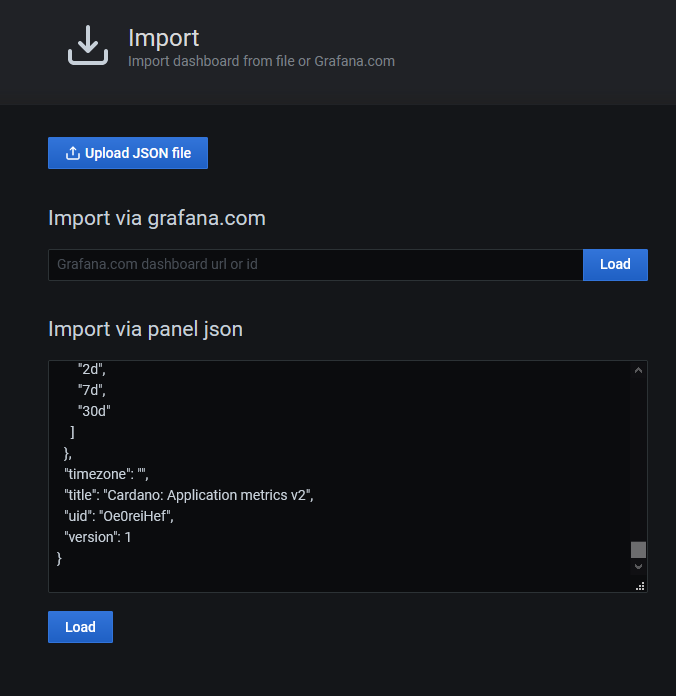
In the next page, at the top right corner, click on Import and paste your clipboard to the textarea appearing in the next screen..
Click on Load.
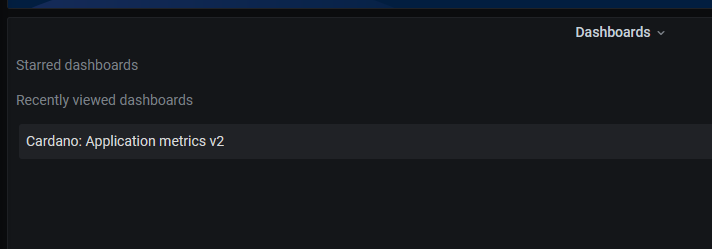
Go back to your welcome screen of Grafana. You should now be able to open your metrics by clicking Cardano: Application metrics v2.

That is all that I have for you now good luck.

link:https://www.cardanocafe.org/blog/knowledge-base-cardano/how-to-setup-prometheus-grafana-monitor-cardano-nodes This is where I got my information

Last updated